How to Install Roofing Shingles: Step-by-Step Guide: Starting a roofing project might seem overwhelming, but with the right steps and tools, you can give your home a beautiful new look. This guide will show you how to install roofing shingles step by step. You’ll learn about preparing the roof, laying down underlayment, and securing the shingles. It’s perfect for DIY fans or professional contractors looking for a successful roofing project.


Key Takeaways
- Understand the different types of roofing shingles and their unique features.
- Gather the necessary tools and materials for a smooth installation process.
- Properly prepare the roof surface to ensure a secure and long-lasting roofing system.
- Learn the importance of correctly installing the underlayment and its role in protecting your home.
- Discover the techniques for properly laying and securing the roofing shingles.
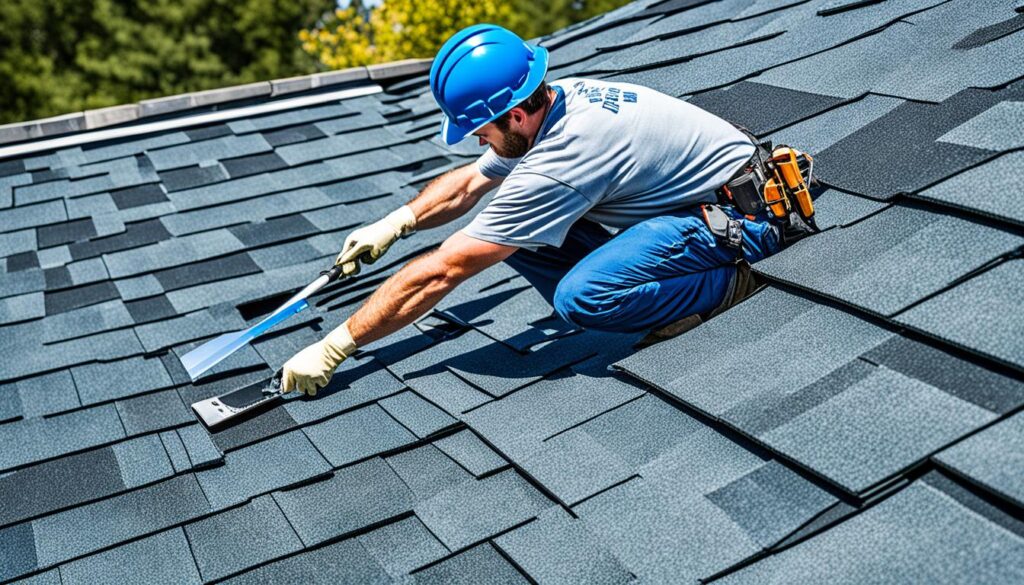
Introduction to Roofing Shingle Installation
Roofing shingles are a top pick for homeowners wanting to boost their home’s look and strength. If you’re como instalar roofing, como instalar roofing de rollo, or como instalar roofing paso a paso, it’s key to know the different shingle types and what tools and materials you’ll need. This knowledge is vital for a successful como instalar roofing#shingles project.
Types of Roofing Shingles
Roofing shingles vary in materials, styles, and colors, each with its own benefits. Here are the main types:
- Asphalt shingles: They’re affordable and protect well against the weather.
- Wooden shingles: They give a natural, rustic look but need more upkeep.
- Metal shingles: These are strong, fire-resistant, and last a long time.
- Tile shingles: They have a Mediterranean look and stand up well to weather.
Tools and Materials Needed
Getting ready is crucial when como instalar roofing, como instalar roofing de rollo, or como instalar roofing paso a paso. Here’s what you’ll need for roofing shingle installation:
| Tools | Materials |
|---|---|
| Roofing nails | Roofing shingles |
| Hammer | Roofing underlayment |
| Utility knife | Roof sealant |
| Chalk line | Roof vents |
| Pry bar | Flashing |
With the right como instalar roofing#shingles knowledge and tools, homeowners can confidently start their roofing projects. This ensures a roof that lasts long and looks great.
Preparing the Roof Surface
Getting the roof ready is a key step in installing roofing shingles. The roof must be clean, level, and ready for new materials. Let’s look at how to prepare the roof for your roofing project.
Cleaning the Roof
Start by cleaning the roof well. Use a broom or leaf blower to remove leaves, twigs, or dirt. This makes the roof clean and even for the new shingles. Don’t forget to check the edges and corners, where debris often gathers.
Inspecting for Damage
Then, inspect the roof for damage or uneven spots. Look for shingles that are warped, cracked, or missing. Fix or replace these to make the roof stable and even.
Leveling the Roof
After cleaning and fixing any damage, level the roof. Use a leveling tool or laser level to find any high or low spots. Add roofing compound or shims to fix these areas. This ensures the new shingles will lay flat and look good.

By doing these steps, you’ll get your roof ready for new shingles. This makes your roofing project successful and long-lasting.
| Step | Action |
|---|---|
| 1. Clean the Roof | Remove debris, leaves, and dirt using a broom or leaf blower. |
| 2. Inspect for Damage | Look for warped, cracked, or missing shingles, and address any issues. |
| 3. Level the Roof | Use a leveling tool or laser level to identify and address any high or low spots. |
Laying the Underlayment
The underlayment is key in installing roofing materials like como instalar roofing de rollo or como instalar el roofing. It acts as a shield between the roof deck and the shingles. This shield keeps the roof safe from moisture, debris, and other environmental factors. Getting the underlayment right is crucial for your roof’s long life and effectiveness.
Importance of Proper Underlayment Installation
Underlayment is crucial for your roof’s performance and durability. When done right, it offers many benefits:
- Enhances water resistance and prevents leaks
- Protects the roof deck from moisture damage
- Creates a smooth surface for shingles
- Improves thermal insulation and energy efficiency
- Offers an extra layer of protection against the elements
Ignoring or installing underlayment wrong can cause big problems. You might see shingles wear out too soon, damage to the structure, and expensive repairs. So, it’s important to follow the maker’s instructions and best practices for installing underlayment for roofing.

| Step | Description |
|---|---|
| 1. Clean the Roof Deck | Make sure the roof deck is clean, dry, and free of debris before putting down the underlayment. |
| 2. Measure and Cut | Measure the roof and cut the underlayment to fit, leaving some extra at the edges. |
| 3. Lay the Underlayment | Start at the bottom of the roof and go up, overlapping each layer as directed. |
| 4. Secure the Underlayment | Use roofing nails or staples to attach the underlayment to the deck, following the maker’s advice. |
| 5. Seal the Seams | Apply a waterproof sealant or tape to seams and overlaps for a solid, weatherproof layer. |
By following these steps and installing the underlayment correctly, you’re setting up a strong and lasting roofing system. This protects your home from the elements, whether you’re installing como instalar roofing de rollo or como instalar el roofing.
como instalar roofing shingles
Installing roofing shingles is key to a strong and weatherproof roof. It’s vital for homeowners and professional roofers alike to know how to como instalar roofing shingles right. We’ll guide you through the steps of como instalar shingles roof, from lining up the shingles to securing and sealing them.
Before starting, get to know the different roofing shingles and their features. This will help you pick the best shingles for your roof and make the installation smooth.
- First, measure the roof and figure out how many shingles you need. This prevents running out during the job.
- Start with the first row of shingles at the roof’s bottom. Make sure they’re evenly spaced and overlap each other.
- Secure the shingles with roofing nails, following the pattern and spacing the manufacturer suggests.
- As you go up the roof, keep the shingles overlapping correctly. Each row should cover the one below it by a certain amount.
- Use roofing sealant to seal the shingles’ edges and stop water leaks.
- Be careful with shingles near vents, chimneys, and other roof features. Make sure they’re sealed tightly for weather protection.
By following these steps, you’ll have a successful como instalar roofing shingles project. You’ll get a roof that’s strong, looks good, and protects your home for many years.
“Proper installation is the key to a long-lasting and efficient roofing system. Take the time to do it right, and you’ll be rewarded with a roof that withstands the elements for years to come.”
Always put safety first when working on a roof. Make sure you have the right safety gear, like a strong ladder, fall protection, and good shoes, to avoid risks.
Flashing and Ventilation
Proper flashing and ventilation are key for a roof’s long life and strength. They protect the roof from water and ensure good airflow. This helps the roof last longer and work better, saving energy.
Importance of Proper Flashing and Ventilation
Flashing is a thin material put at the roof’s edges and around openings. It makes a seal to keep water out. For como instalar metal roof and como instalar roof de metal, flashing is vital for a roof’s long life.
Ventilation keeps the indoor air healthy and stops moisture from building up. It lets hot air out, easing the load on cooling systems. This helps avoid mold and mildew, which can weaken the roof.
Installing flashing and ventilation right can make a roof last longer and work better. This is especially true for como instalar roofing de metal, as metal roofs need special flashing and ventilation.
Finishing Touches
As you finish your roofing shingle project, focus on the final details for a pro and lasting result. como instalar roofing#shingles and como instalar el roofing are key at this point.
First, trim any extra shingles or materials at the roof’s edges. This makes the roof look better and prevents water damage or gaps. Use a utility knife or tin snips for a clean edge.
Then, seal any exposed nails or fasteners with roof sealant or caulk. This seals leaks and keeps your roof safe. Make sure to apply the sealant well for the best protection.
Finally, clean the work area well. Remove debris, tools, or leftover materials to keep the site clean and safe. This shows you care about details and keeps the area ready for other projects.
“Attention to the finishing touches can truly elevate the quality and longevity of your roofing installation.”
These steps make your como instalar roofing#shingles and como instalar el roofing project look great and last long.
Safety Considerations
Roofing work can be dangerous, so safety is key. By being careful, you can make sure your roofing project goes well and safely. This part will talk about two important safety topics: ladder safety and how to prevent falls.
Ladder Safety
Using ladders safely is very important when you’re on a roof. Make sure the ladder is on a solid, flat ground and tied down to stay in place. Always keep three points of contact when climbing, and don’t reach too far or stand on the top rung. It’s also a good idea to have someone hold the ladder steady or use a stabilizer for extra safety.
Fall Protection
Working high up can lead to falls, which can cause serious harm. Use safety gear like safety harnesses, lifelines, and anchors to lower the risk. Learn how to use these safety tools right and check they’re set up and working well before starting work.
FAQ
What are the different types of roofing shingles available?
Asphalt, metal, tile, and cedar shake shingles are common roofing options. Each type has its own set of benefits and installation needs.
What tools and materials are needed to install roofing shingles?
You’ll need a roof saw or utility knife, roofing nails, a hammer, a chalk line, and a utility knife for installation. Don’t forget the roofing underlayment, like felt paper or synthetic underlayment.
How do I prepare the roof surface before installing shingles?
Start by removing old roofing materials. Ensure the roof deck is clean, dry, and free of debris. Check for and fix any damaged or rotted areas on the deck.
Why is the underlayment important in a roofing installation?
Underlayment acts as a secondary protection layer. It stops water from getting through and makes a smooth surface for the shingles.
How do I properly install roofing shingles?
Begin by aligning the first course of shingles. Overlap them and secure with roofing nails. Use sealant or adhesive as directed by the manufacturer.
Why is proper flashing and ventilation important for a roofing system?
Flashing and ventilation are crucial. Flashing keeps water away from weak spots. Ventilation ensures airflow and prevents moisture buildup, which can damage the roof.
What are some important safety considerations when installing roofing shingles?
Always prioritize safety on the roof. Use proper ladder safety, wear fall gear, and avoid slips and falls.